Monday, December 28, 2009

handmade Christmas presents for family

Click on the picture to view item


..............................................................................................................................
Visit madeit.com.au for more handmade gift ideas

Wednesday, December 23, 2009

Christmas presents for me!!

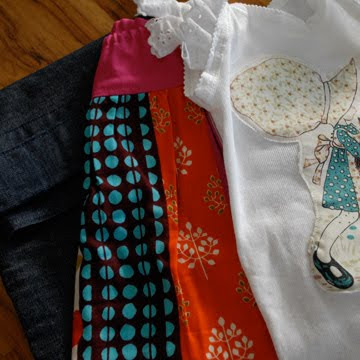
Searching for new finds for our newsletter I often find a few things for myself, below are my latest purchases. Bec x

Click on the picture to view item


..............................................................................................................................
Visit madeit.com.au for more handmade gift ideas

Friday, December 18, 2009

The Christmas Table

We are having Christmas Day at my Mum’s. She always puts on a great day and Mum is a really good cook who isn't afraid to try something new. This year I offered to set the table for Christmas Day - that's one less thing Mum has to do on the day!!

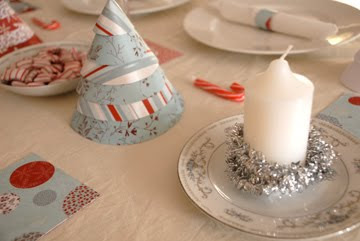
My inspiration was the red & white stripe lollies & the gorgeous blue & red paper I picked up at the craft store ($2.50 per sheet). The vintage dishes were bought at the op-shop for 30c each, the bowls are filled with lollies while the saucers are bases for the candles. The coaster & napkin rings are made from the scrapbook paper; the coasters were covered in clear contact for protection. The paper Christmas trees I made yesterday look great on the table.

Fingers Crossed Mum likes the Christmas table…
Bec x


Thursday, December 17, 2009

table decorations : paper christmas trees


Price: cost of materials
Time to make: 0.5 hours per tree
Ability: Beginner

Looking for something funky and easy to make for your Christmas table - we think these paper Christmas Trees will do the trick.

This tutorial is perfect for the lovely double-sided scrapbook paper we bought at the craft store for $2.50 per sheet.

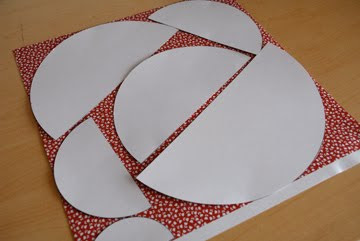
First we cut out a template on thinker cardboard and traced around the shapes on the scrapbook paper. Then we traced the shapes onto the paper and cut out the shapes, simply fold and glued the straight edge to form a cone. Stack the different sized cones to form your Christmas tree. Gorgeous!!

next... setting the Christmas table
Bec xx


Wednesday, December 16, 2009

wrapped with love! handmade of course...


Price:
cost of materials
Time to make: 2 hours per roll of brown paper
Ability: Beginner

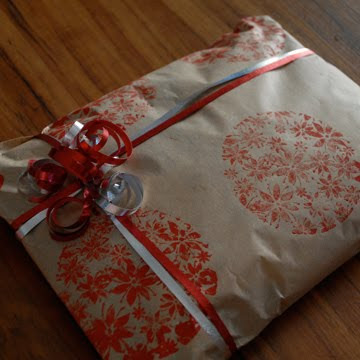
Well it's Christmas time and we are carrying the handmade theme right through to the wrapping paper. This is great project to get the kids busy in the week leading up to Christmas. All you need is some brown paper - we bought a 5m roll for $2.95, a stamp (you can make a potato stamp, make a stamp using linocut or buy a ready made stamp from your craft store), paint and some ribbon to finish off your paper.

If you have a large outdoor table you can lie down a protecting sheeting (newspaper or cardboard) and then roll out the paper, as you work down the roll the paint on the starting edge will dry and you can simply roll up the paper and continue on to the end.

This handmade paper is the prefect wrapping paper for my handmade presents and it will add a extra personal touch to your presents.

Best go and wrap some more presents..
xx Bec


Tuesday, December 15, 2009

last minute Christmas goodies!!

Click on the picture to view item


..............................................................................................................................
Visit madeit.com.au for more handmade Christmas gift ideas

Monday, December 14, 2009

Project: Reversible Diary/Journal Cover


Price:
Free online
Time to make:1.5 hours
Clear instructions included: Yes
Additional material needed: Yes
Ability: Beginner

I just love this reversible diary/journal cover project by Australian fabric designer Lara Cameron and if you can only sew a straight line then this journal project is for you!

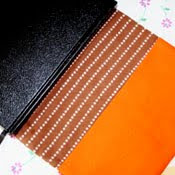
It's also a great way to use up any itty bitty bits of favorite fabric that you just couldn't bear to throw out. I used this gorgeous piece of fabric from another Australian fabric designer PippiJoe and teamed it up with some off cuts from the sewing shelf. I really enjoyed this project, the instructions were easy and clear to follow and it made a very ordinary diary something special and unique, something I'd love to actually use.

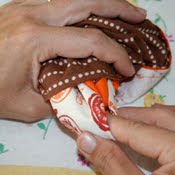
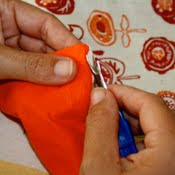
All you'll need is three pieces of fabric, your trusty sewing machine, some paper and an iron for the finishing touch. Follow the instructions precisely, usually I would use a 1cm seam allowance but the instructions recommend 7mm, the finished product was a perfect fit. I made a pattern from some scrap paper but if you feel confident I guess you could mark out the measurements directly onto the back of the fabric.

A couple of things that could be done differently... If you use a schedule everyday and your cover is going to take a beating it would be a good idea to interface the fabric with something light.

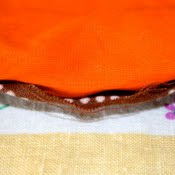
The tutorial mentions, "Personally I'd like to find a way to get the corners sharper so they're not so rounded, but I can't seem to poke them out enough. Must be something to do with the way it's all stitched together..." I would suggest not sewing to the very edge of your fabric, stop 7mm short and back stitch, each seam should meet. Before turning your cover inside out trim the corners, making sure not to nick any of the stitching, there will be less fabric left inside thus sharper corners!

Schedule in some sewing, get your 2010 diary covered this weekend and start off the new year in style. The cover won't take you long to make but you'll being enjoying the fruits of your labour for a long time to come and best of all it's reversible so you can change it for a different look next year.

Happy sewing.
Vanessa.
madeit's project & research gal
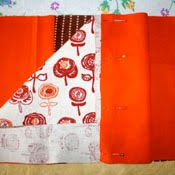


WIN WIN WIN!!
To win this journal cover and 2010 diary simply leave a comment and tell madeit about one of your plans for 2010. It can be personal or business. New Year's Resolutions are out 2010 plans are in!

............................................................................................................................

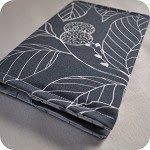
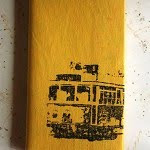
Don't have time to make this Diary/Journal cover? Check out these options on madeit.com.au. Click the image to view item.
You may also like:

Related Posts with Thumbnails